Microsoft Defender
- 04 Jun 2025
- 2 Minutes to read
- Contributors


- Print
- DarkLight
Microsoft Defender
- Updated on 04 Jun 2025
- 2 Minutes to read
- Contributors
- Print
- DarkLight
Article summary
Did you find this summary helpful?
Thank you for your feedback!
Steps to Configure
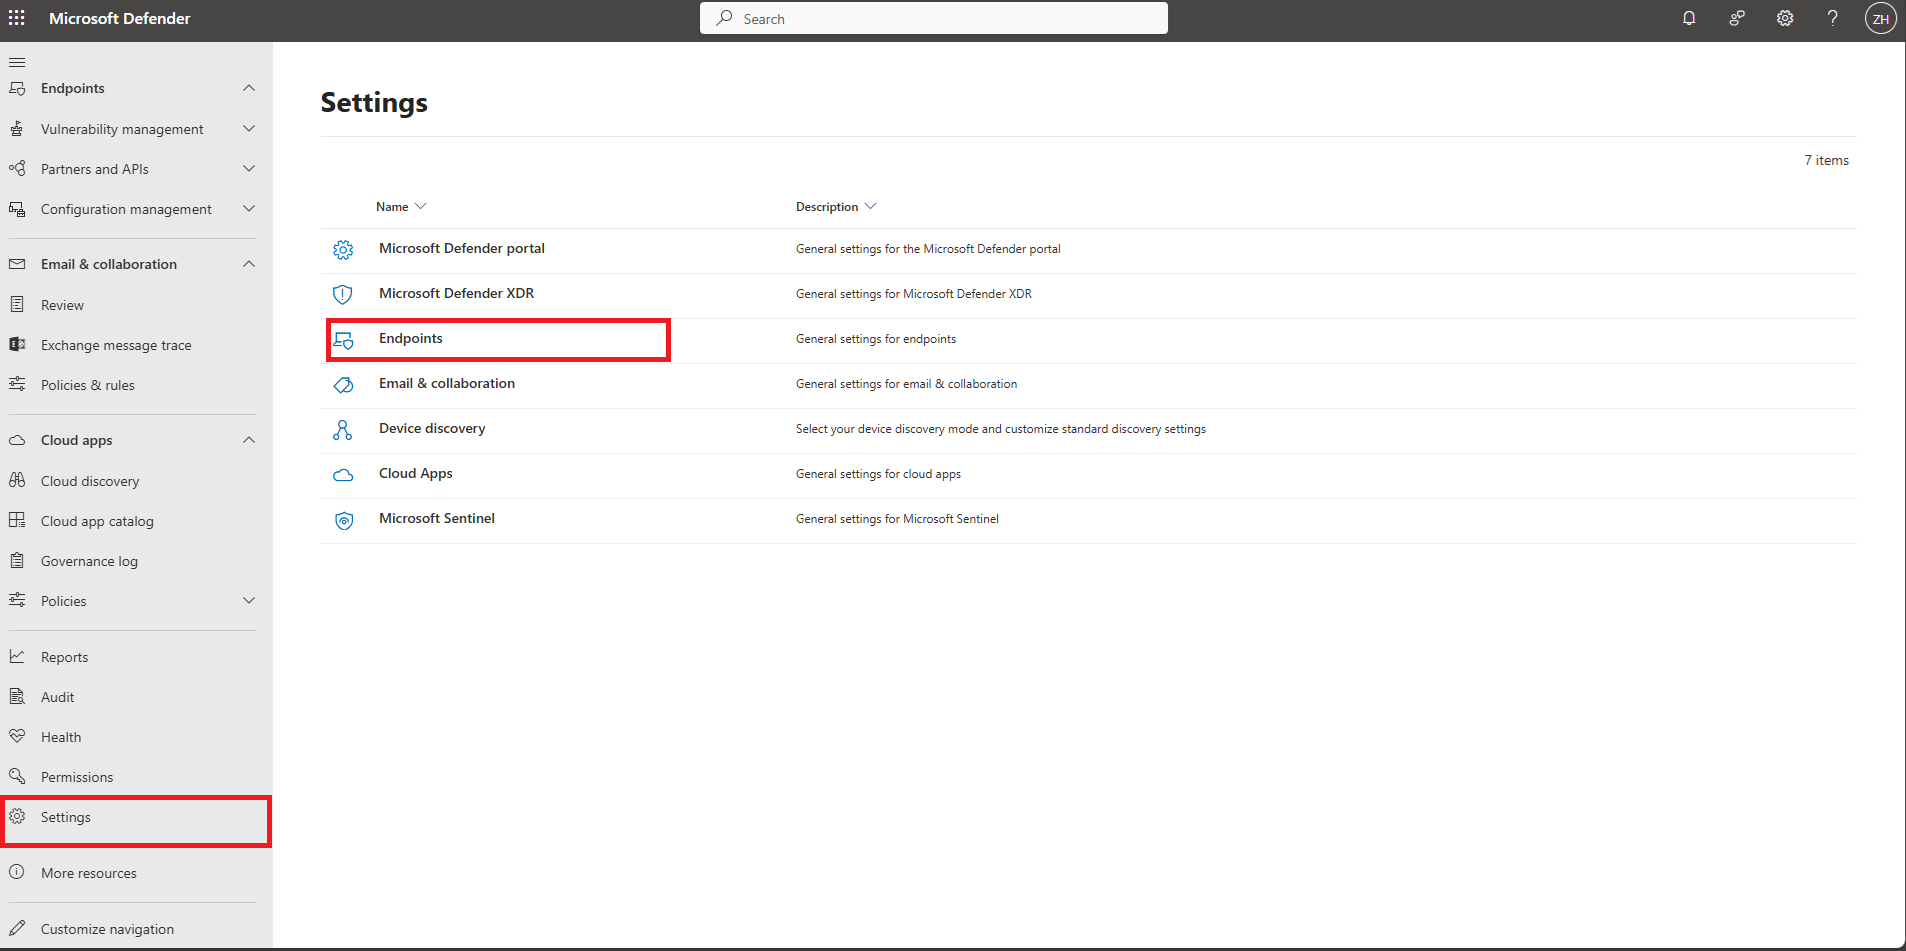
- Go to Microsoft Defender Security Center and login (user must have Global Administrator Role)
- Go to Settings → Endpoints
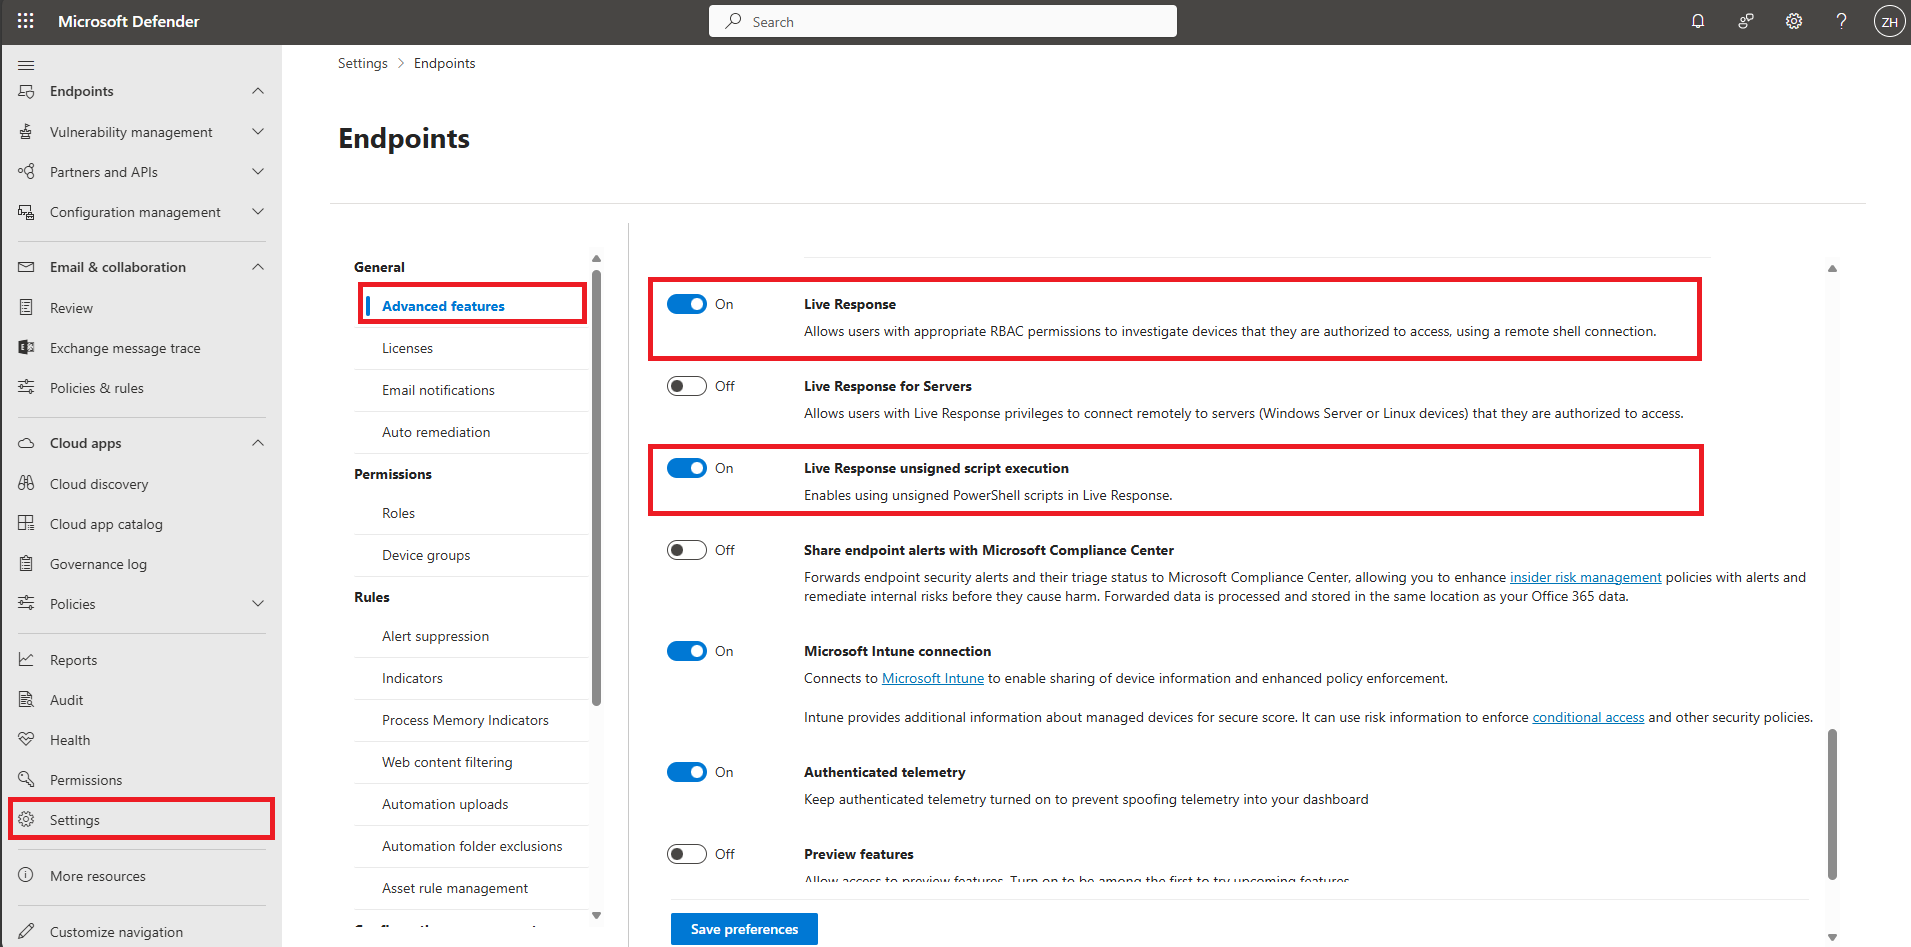
3. Under the General → Advancedfeatures, Keep Live Response and Live Response Unsigned script execution toggled on
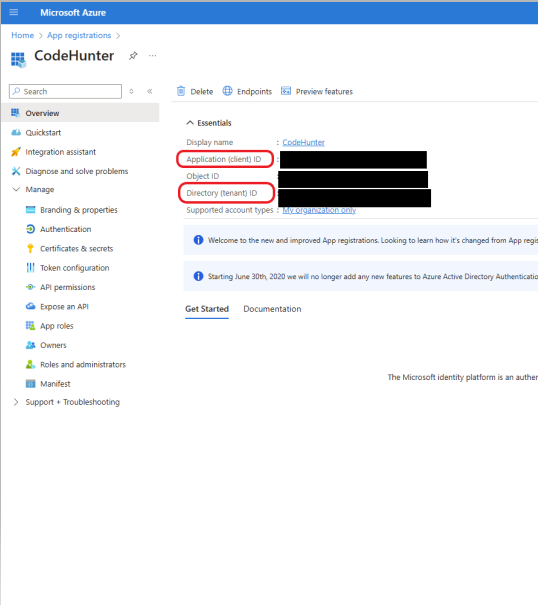
The CodeHunter connector requires a Application (client) ID, Directory (tenant) ID, and client secret value from your Microsoft account following the below steps.
Steps to Create
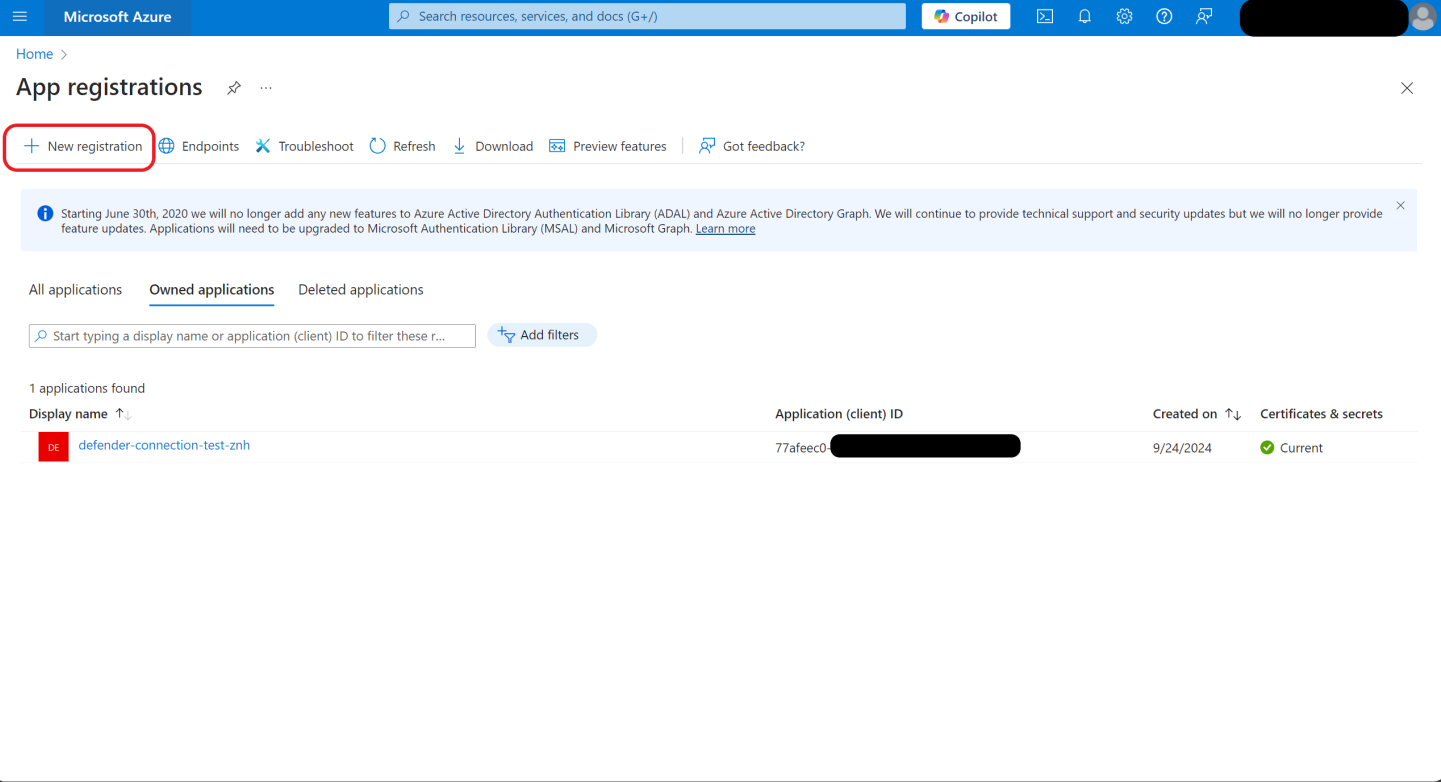
- Navigate to App registrations - Microsoft Azure and login (user must have Global Administrator Role).
- Click on New Registration:
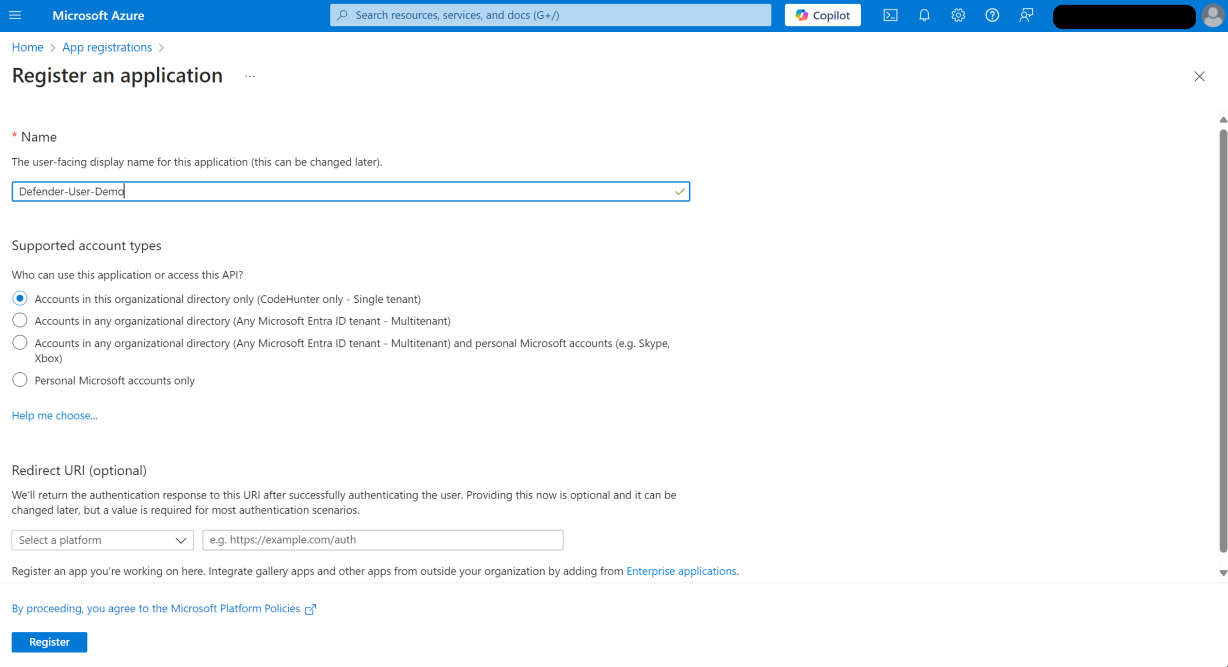
3. Register CodeHunter Application as follows:
- Fill the Name field with CodeHunter and select the supported account type.
- Choose appropriate supported account type.
- Click Register
4. After clicking “register”, you should see an Application (client) ID and a Directory (tenant) ID which will be used in the CodeHunter user interface Integration Window.
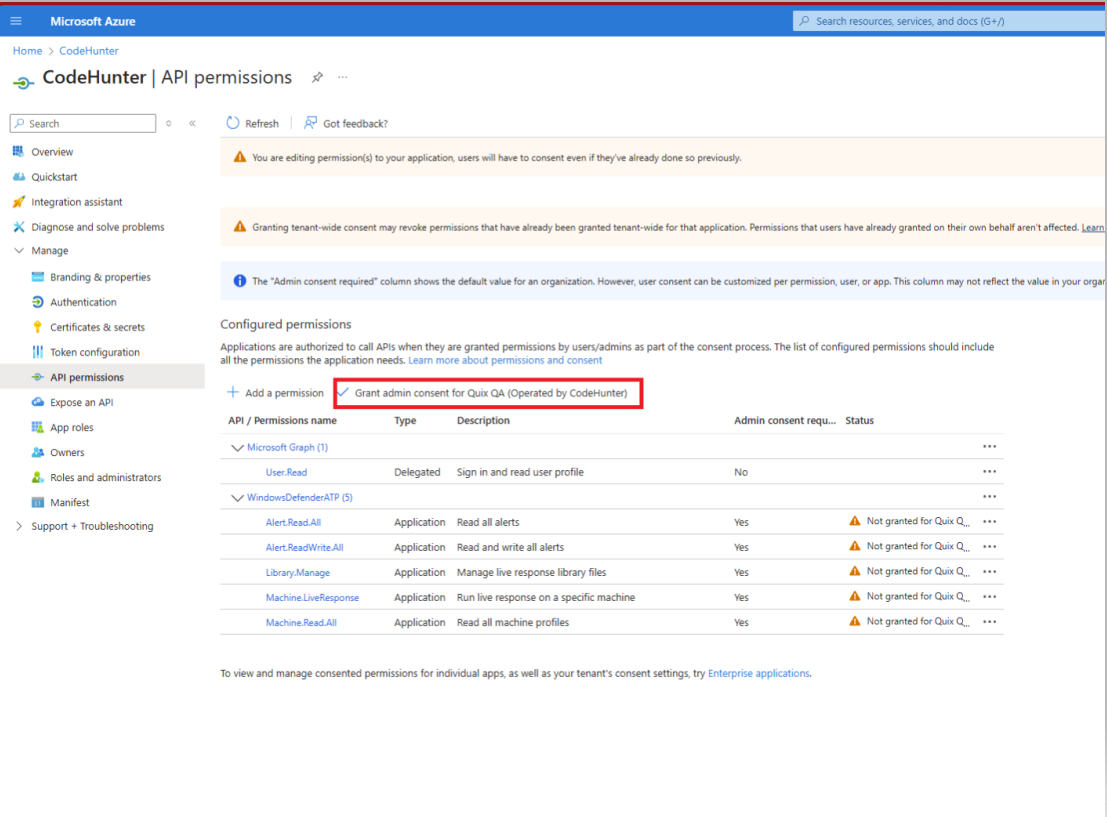
5. From the left side bar, navigate to Manage → API permissions
- Under Configured Permissions, click on Add a permission. The Request API permissions will be displayed on the right side.
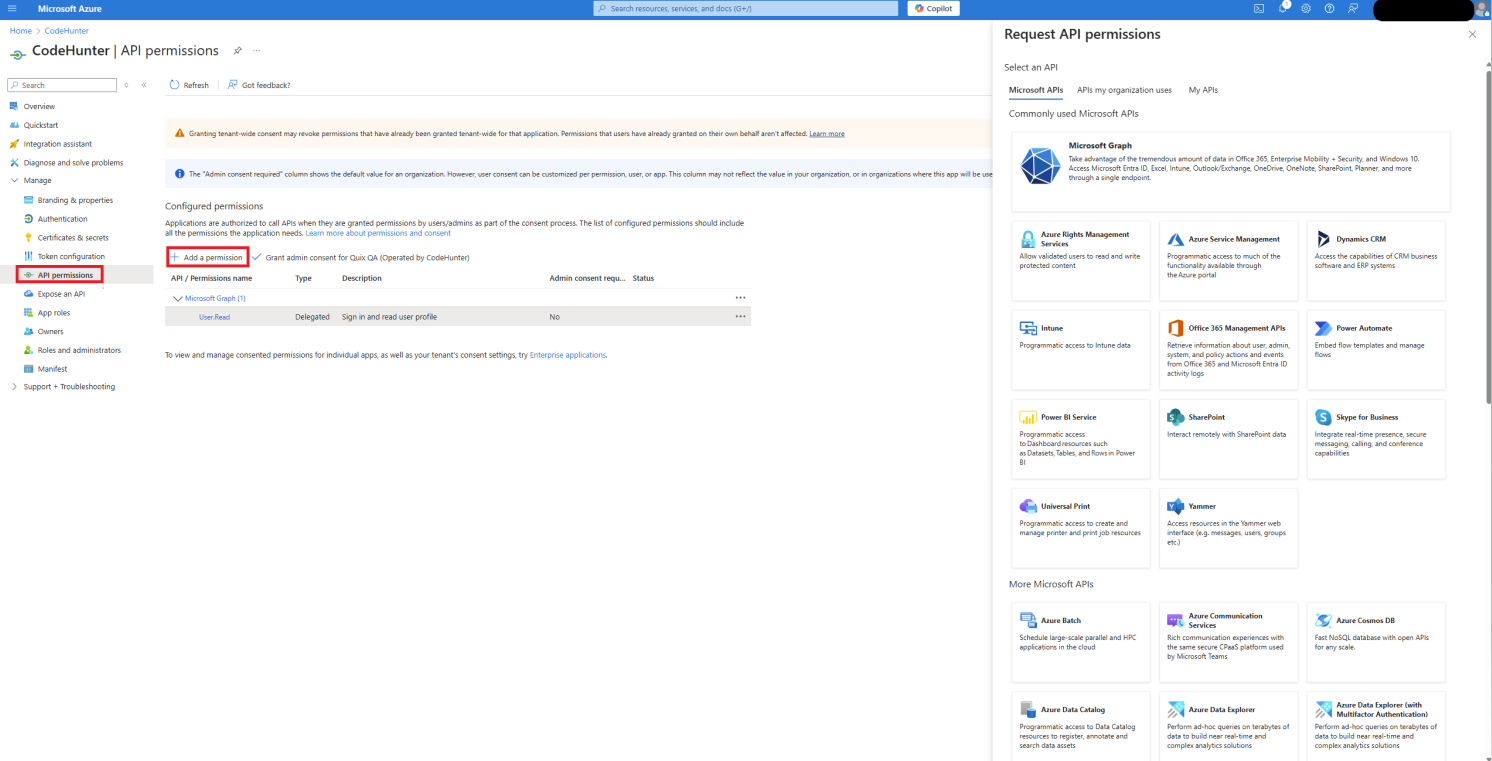
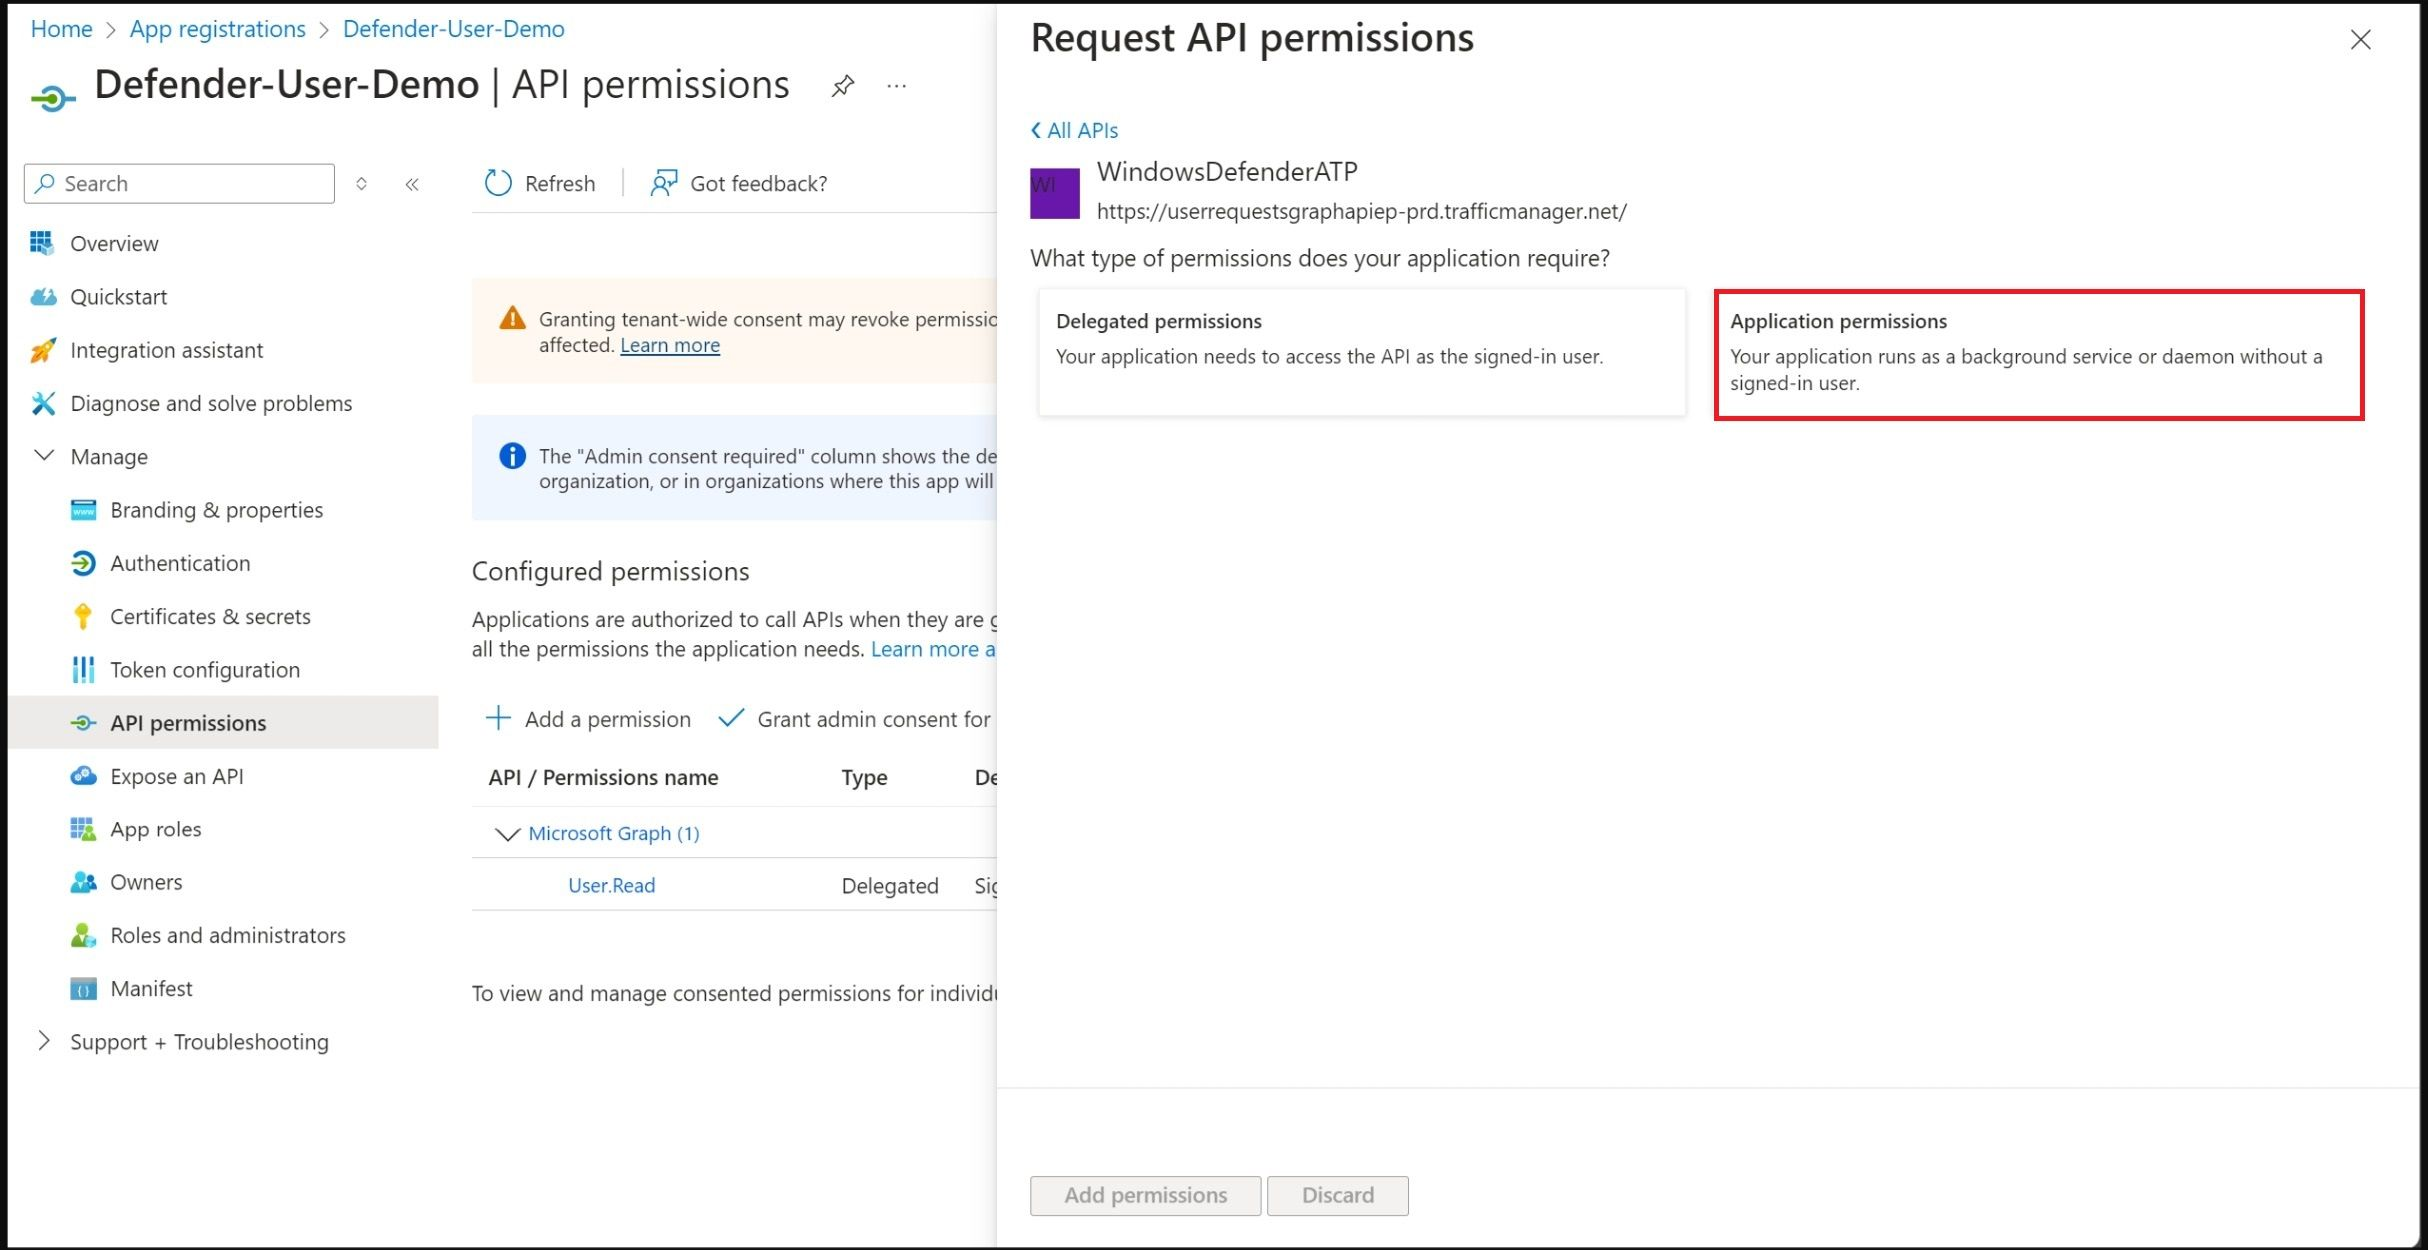
b. Click on APIs my organization uses and in the search box search for “WindowsDefenderATP”. Once you find “WindowsDefenderATP”, then click on it.
c. Click on “Application permissions”.
d. After clicking on Application permissions, select the API permissions that are listed in the table below. Click on Add permissions to proceed.
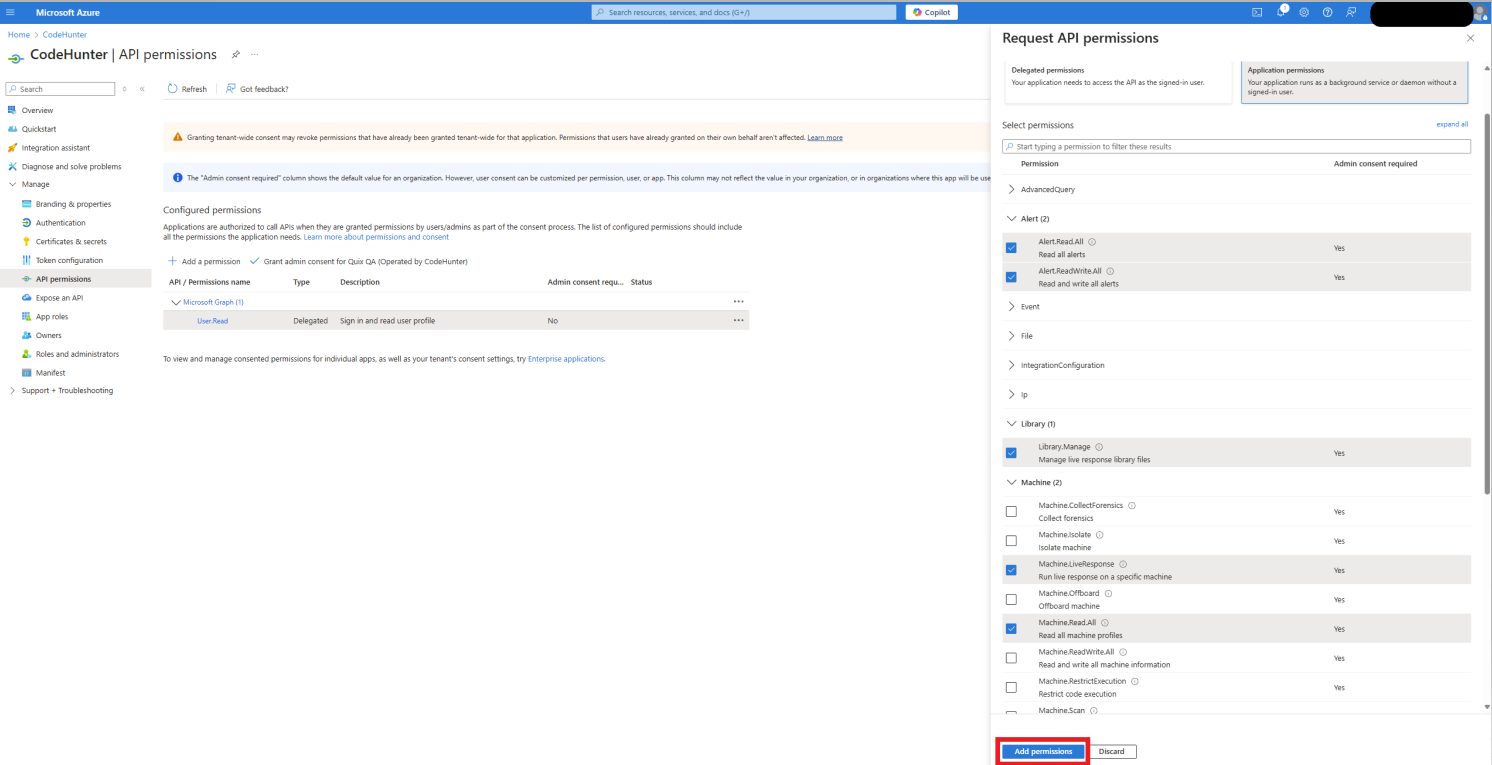
API Permissions Table
Category | API Permissions | Description and Use |
Alerts | Alert.Read.All | Needed to read alerts |
Alerts | Alert.ReadWrite.All | Needed to post CodeHunter Analysis notes under alerts. |
Library | Library.Manage | Needed to upload custom PowerShell scripts. |
Machine | Machine.LiveResponse | Needed to retrieve copy of the file. |
Machine | Machine.Read.All | Needed to retrieve information about machines. |
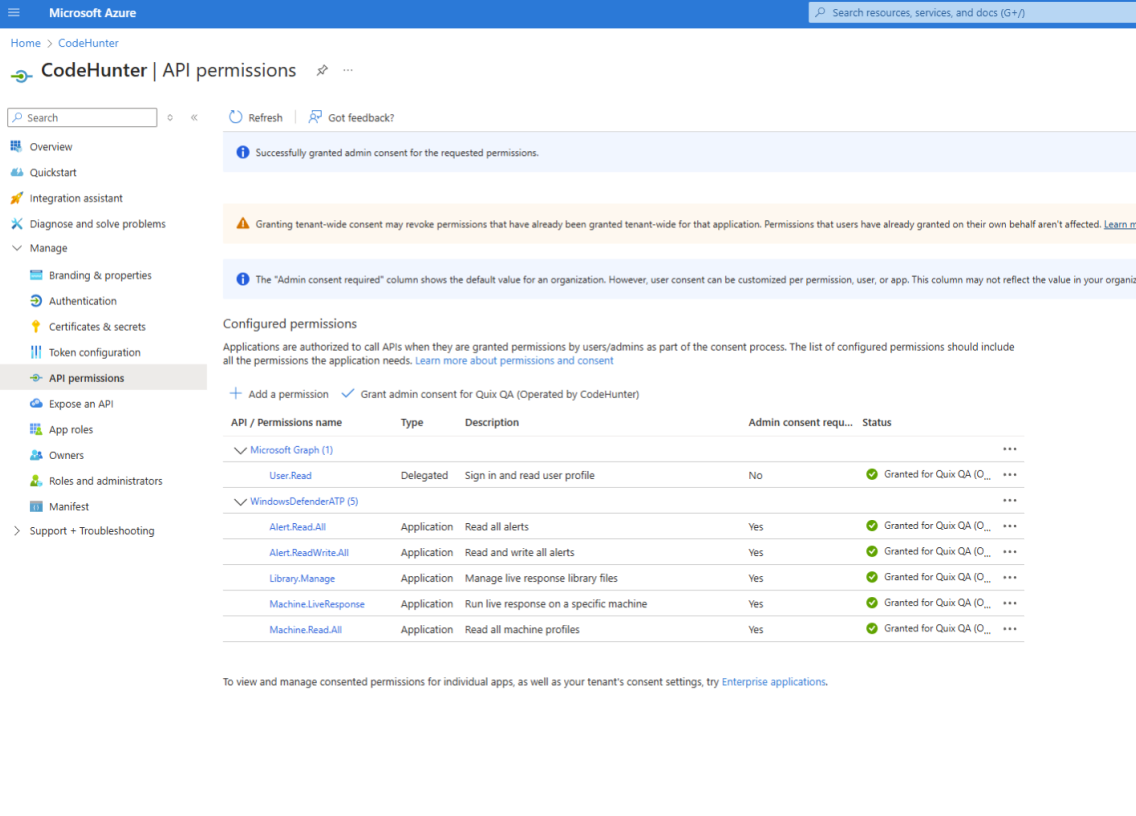
7. Your configured permissions will show a status of 'Not Granted.' If you are an admin, click 'Grant admin consent for [Tenant]' to approve these permissions.
- After admin consent is granted, your API permissions will display a status of ‘Granted’.
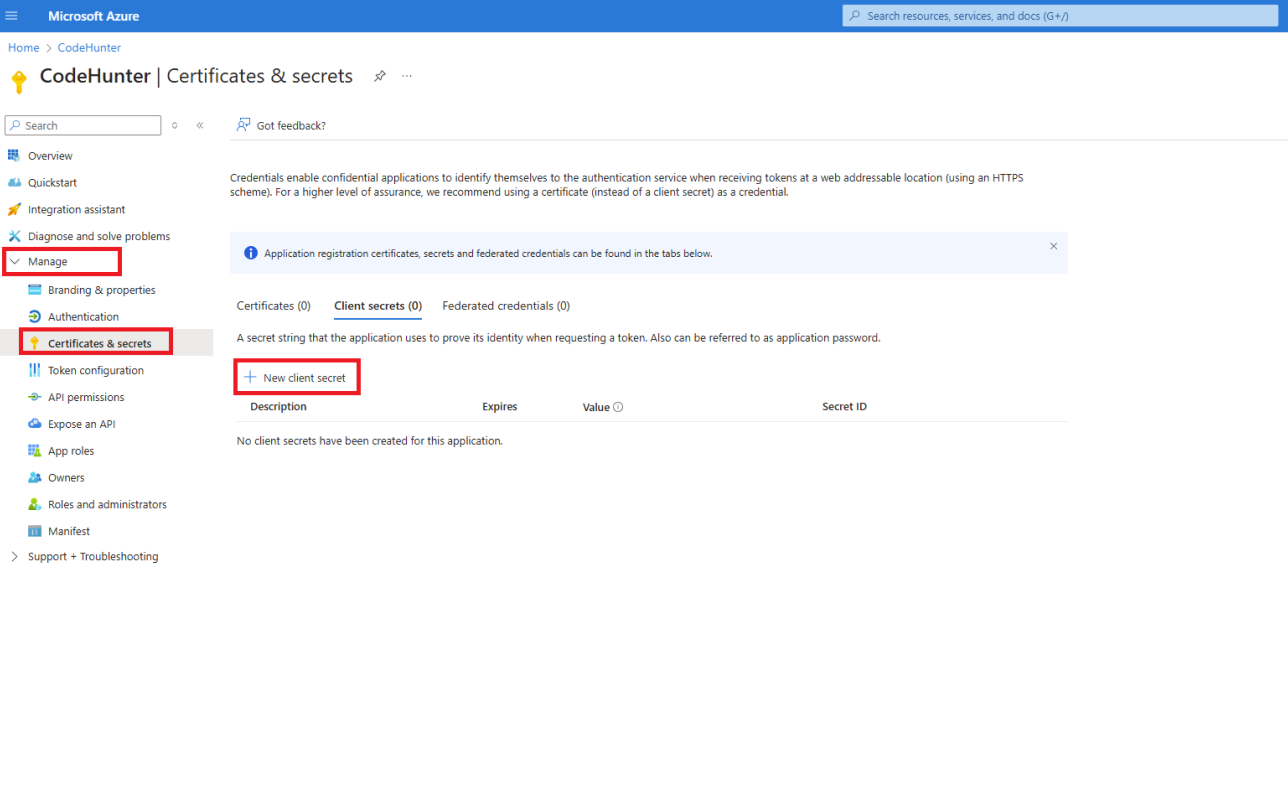
8. From the left side bar, navigate to Manage → Certificates & secrets and then click on New client secret. Add a client secret window will be displayed on the right side. Fill the description field with CodeHunter Application Secret and pick desired expiration date.
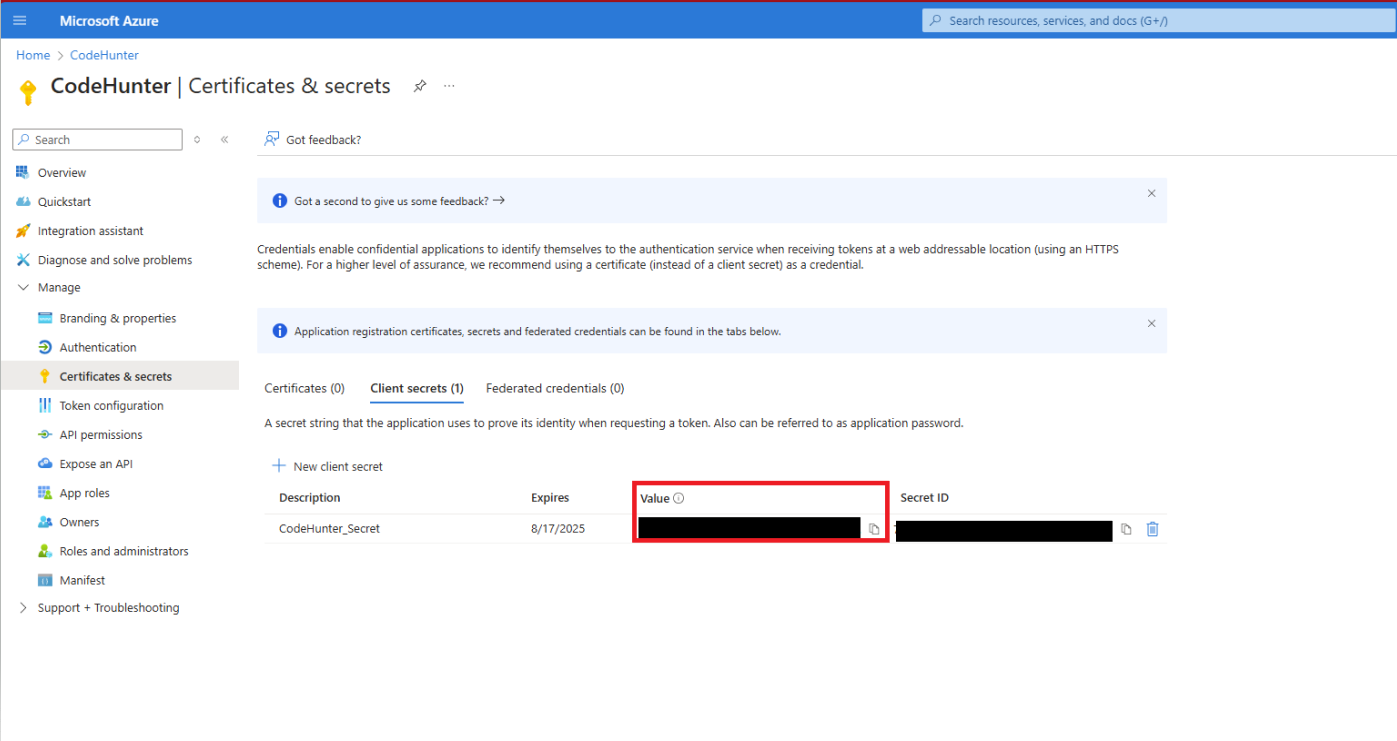
9. Copy the Client Secret “Value” and store it somewhere locally as the string is only showed once. This string will be needed in next step when creating a Microsoft Defender Connector (see step 10).
10. Login to your CodeHunter Account (User must have either an Administrator or Analysis CodeHunter Role)
11. On the left side bar, click on Integrations, and then click on Create New in the Microsoft Defender card.
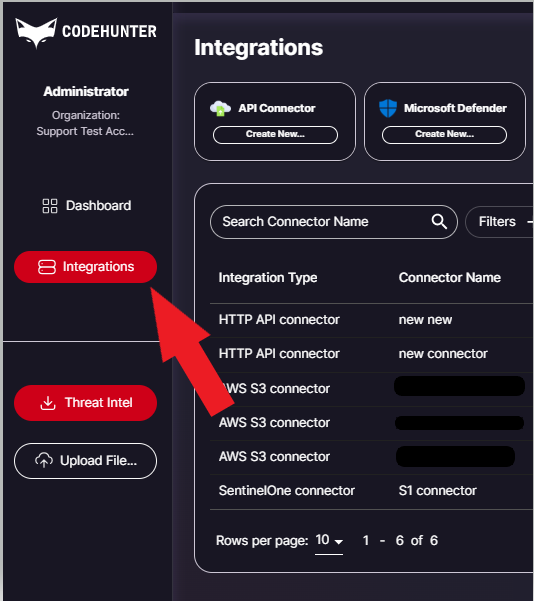

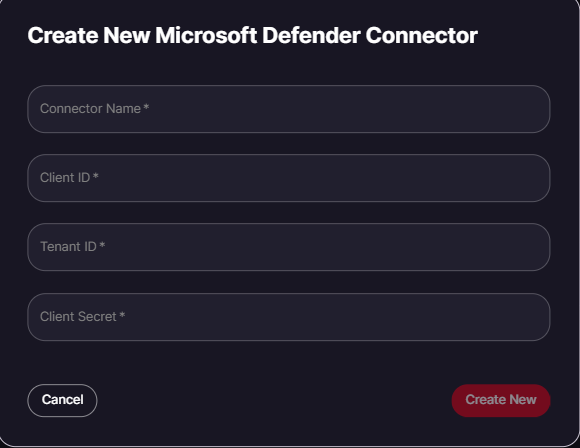
12. Create New Microsoft Defender Connection in CodeHunter Integration window as follows
- Fill the Connector Name field with your company name.
- Fill the Client ID field with the value of Application (client) ID from step 5.
- Fill the Tenant ID field with the value of Directory (tenant) ID from step 5.
- Fill the Client Secret with client secret obtained in step 9.
13. Your new integration will be 'Disabled' by default. Please ensure that you switch the integration to 'Enabled' and your files will begin to be captured by CodeHunter!
Was this article helpful?